05. Notebook interface
Notebook interface
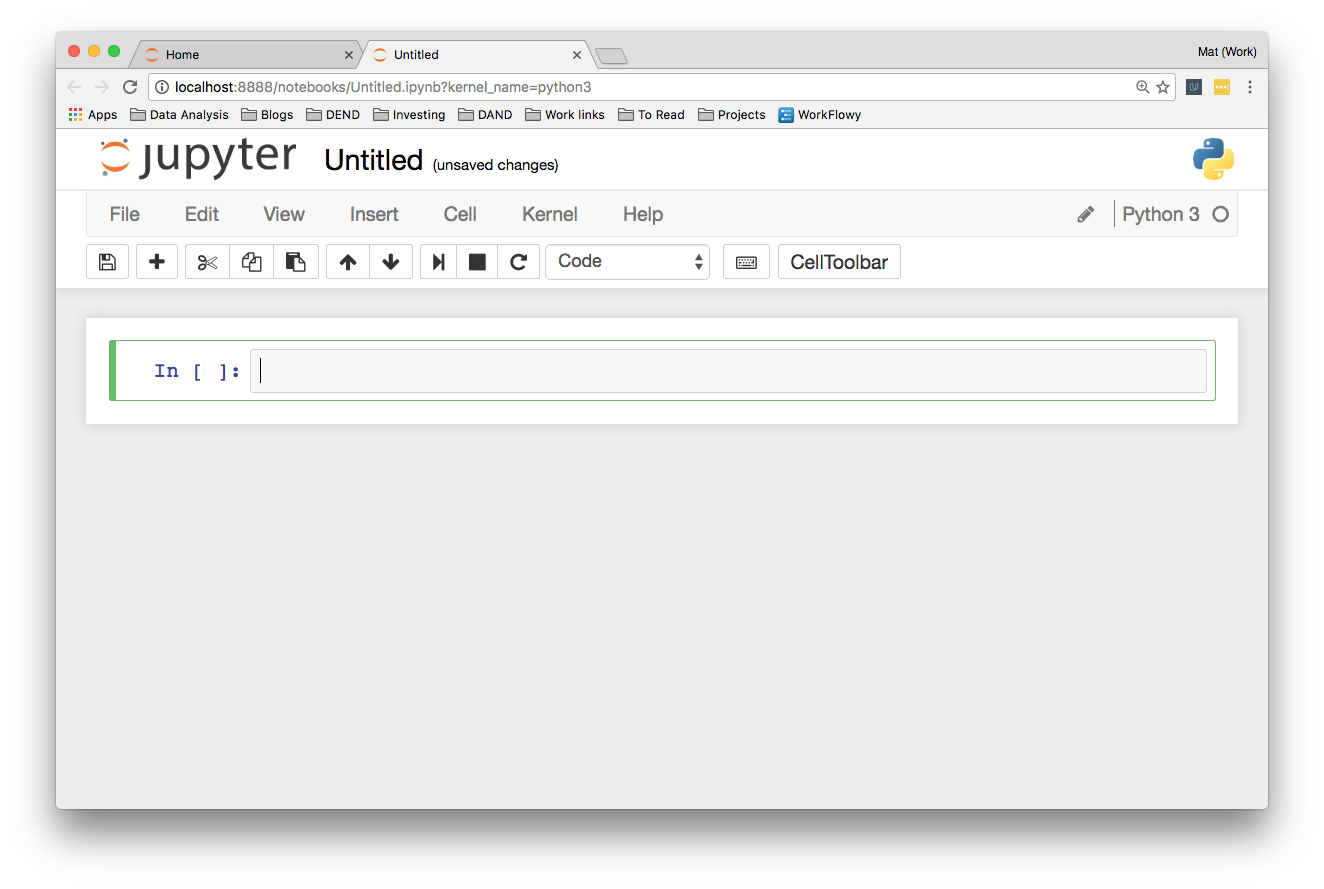
When you create a new notebook, you should see something like this:
Feel free to try this yourself and poke around a bit.
You’ll see a little box outlined in green. This is called a cell . Cells are where you write and run your code. You can also change it to render Markdown, a popular formatting syntax for writing web content. I'll cover Markdown in more detail later. In the toolbar, click “Code” to change it to Markdown and back. The little play button runs the cell, and the up and down arrows move cells up and down.
When you run a code cell, the output is displayed below the cell. The cell also gets numbered, you see
In [1]:
on the left. This lets you know the code was run and the order if you run multiple cells. Running the cell in Markdown mode renders the Markdown as text.
The tool bar
Elsewhere on the tool bar, starting from the left:
- The anachronistic symbol for "save," the floppy disk. Saves the notebook!
-
The
+button creates a new cell - Then, buttons to cut, copy, and paste cells.
- Run, stop, restart the kernel
- Cell type: code, Markdown, raw text, and header
- Command palette (see next)
- Cell toolbar, gives various options for cells such as using them as slides
Command palette
The little keyboard is the command palette. This will bring up a panel with a search bar where you can search for various commands. This is really helpful for speeding up your workflow as you don't need to search around in the menus with your mouse. Just open the command palette and type in what you want to do. For instance, if you want to merge two cells:
More things
At the top you see the title. Click on this to rename the notebook.
Over on the right is the kernel type (Python 3 in my case) and next to it, a little circle. When the kernel is running a cell, it'll fill in. For most operations which run quickly, it won't fill in. It's a little indicator to let you know longer running code is actually running.
Along with the save button in the toolbar, notebooks are automatically saved periodically. The most recent save is noted to the right of the title. You can save manually with the save button, or by pressing
escape
then
s
on your keyboard. The
escape
key changes to command mode and
s
is the shortcut for "save." I'll cover command mode and keyboard shortcuts later.
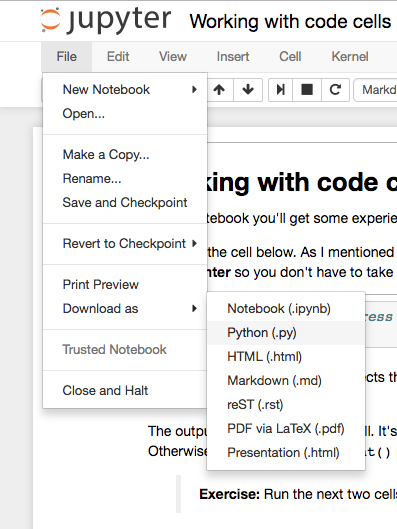
In the "File" menu, you can download the notebook in multiple formats. You'll often want to download it as an HTML file to share with others who aren't using Jupyter. Also, you can download the notebook as a normal Python file where all the code will run like normal. The Markdown and reST formats are great for using notebooks in blogs or documentation.